While searching Etsy, I found these sweet items!
Saturday, October 26, 2013
Wednesday, October 23, 2013
No Sew Fabric Bookmark
So... some of you may remember my post for the back to school fabric bookmark here and some have no idea what I'm talking about. No prob if that's you, just click here to catch up with the rest of us. :)
I had some interest in a no sew option, well here ya go!
Gather your supplies, you will also need scissors, ruler, iron.
-coordinating fabric
-fusible web
-ribbon
Sorry for these pics. I tried using my phone this time and clearly it is time for an upgrade. I'm just not ready to fork out the money for that. I vow today to not be lazy, I'll pick up my camera next time for pics.
1. Cut 2 - 2"x7" pieces of fabric along with 1 - 1 3/4"x 6 3/4" piece of fusible web. Also cut 1 ribbon piece 2 1/2" long. Then iron all visible wrinkles from fabric pieces because they will show in the end if you do not iron them out.
2. You can skip to step 3 if you don't want to use pinking shears. Other wise, place fabrics wrong sides together and cut with pinking shears ONLY long top of bookmark. (Make sure fabric patterns are facing up before cutting.) Clearly, from the photos, I did not follow my own directions here and it was tricky cutting the top of the bookmark without cutting the ribbon.
3. Place ribbon in middle of fabric, the end should be 1 3/4" from the top.
4. Place your fusible web on top of all that, careful not to move your ribbon.
5. Then hold heated iron over top for about 6 seconds. Let it cool.
6. Once cool, peel paper off.
Enjoy!
I had some interest in a no sew option, well here ya go!
Gather your supplies, you will also need scissors, ruler, iron.
-fusible web
-ribbon
Sorry for these pics. I tried using my phone this time and clearly it is time for an upgrade. I'm just not ready to fork out the money for that. I vow today to not be lazy, I'll pick up my camera next time for pics.
1. Cut 2 - 2"x7" pieces of fabric along with 1 - 1 3/4"x 6 3/4" piece of fusible web. Also cut 1 ribbon piece 2 1/2" long. Then iron all visible wrinkles from fabric pieces because they will show in the end if you do not iron them out.
2. You can skip to step 3 if you don't want to use pinking shears. Other wise, place fabrics wrong sides together and cut with pinking shears ONLY long top of bookmark. (Make sure fabric patterns are facing up before cutting.) Clearly, from the photos, I did not follow my own directions here and it was tricky cutting the top of the bookmark without cutting the ribbon.
3. Place ribbon in middle of fabric, the end should be 1 3/4" from the top.
4. Place your fusible web on top of all that, careful not to move your ribbon.
5. Then hold heated iron over top for about 6 seconds. Let it cool.
6. Once cool, peel paper off.
7. Line up second piece of fabric over top, then iron again for about 8 seconds. Let it cool.
8. It's ready from this point to be used! Or you can trim with pinking shears for a fun whimsical look.
Enjoy!
Saturday, October 19, 2013
Thursday, October 17, 2013
Fall is HERE!!!
I can never explain how wonderful fall makes me feel!
It is the time of year I over load myself and my family with all things pumpkin flavored. We also make our annual trip to the apple orchid in North Georgia several weeks ago. I finally finished organizing the photos. We make a FFF (Forced Family Fun) day of it, although it's not forced to much at this age.
There are definitely moments that feel like torture which you will see in some of the photos but over all it goes down in our family history as a fun day!
WARNING, This is a picture heavy post!
We road the hayride out to the orchid and started picking! I made the family pause for picture first, then I let them start picking of course.
Then made the family pause for a couple more and this is what I get. LOL! They are such a mess!
This orchid is sooooo pretty! I love it here!
Since I'm rarely in photos and Rachel is old enough to be trusted with the camera, I asked her to take a picture of me and Daddy. While I was getting the settings just the way I wanted, this is what I got in between. He is a mess!
Finally a decent pic!
Well that was short lived!
Daddy photo bomb! It didn't work on Rachel though. She knows he is usually up to no good. :)
We got our loot and ready to take the hayride back to the front store to get a treat!
One last aggravation before we load onto the trailer.
Jacob loves those HUGE pickles in the jars. We got him one to share among the kids.
We got our mini fried pies and headed out front to sit and enjoy. Daddy got a chocolate, Jacob and Ashley got apple, Rachel got peach, and I got pumpkin. Boy are those pies good!
Yep all our little bowls looked like this!
Ashley wanted a turn with the camera, then Daddy, then Jacob. Jacob got into it and took LOTS of photos and moved around to get different angles. LOL!

Jacob was too cute and I had to get a shot with my phone.
Then he got REALLY close for a close up shot. Back up a little boy! :)
Time to walk around the store and get our apple cider slushy cause it was warm that day, then play on the tractor.
Finished up at the orchid. It's time for our Bar-B-Q lunch! This is NOT a fave food for our kids so you can imagine the moans and groans when this time arrived. We found a some perks for them while we ate there though.
"Children are a blessing from the Lord." HA, I have to repeat this verse in those hard moments when kids just wont cooperate.
On the way home, we found a jewel of a pumpkin patch! It was the perfect way to end the day. This was the first time we have ever been here, but will definitely be on your routine stop in the years to come!
Their pumpkins were HUGE! The whole farm was a lot of fun!
I will definitely be making a sign like this for our house next to the front door!
Kids are always saying "in the olden days" or "old timey" to describe history so this tree made us crack up laughing because this is a real name for that tree.
Every pumpkin patch should have a Corn Cannon, don't ya think!
Don't know if you can see this this photo, but Rachel was aiming for the bucket that said FREE POPCORN. She was going to get that for her Daddy, but it ended up in the tree on the right side of the photo. HA!
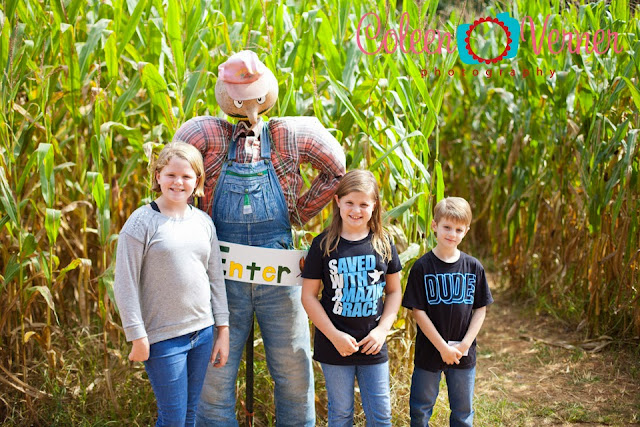
Next was the Corn Maze!
They let us have a map to help us find our way.
We made it out of the maze. Now it's time to pick the perfect pumpkin for our porch!
This picture about sums it up! on the other side was the front of the animals. As we were walking out Ashley saw that and said we used the wrong side. Daddy said "No, honey, we used the right side for this nutty family!" Tru Dat!
There was also a butterfly garden that Ashley thought was so cool. She was touching all the butterflies by using her sneaky skills.
Jacob said he would make sure the pumpkin doesn't roll around for us on the ride home. Sweet boy!
Then he told the pumpkin "I've got my eye on you!" We were rolling with laughter. That kid is too much sometimes.
Molly helped me set up the pumpkins on the porch after we arrived home.
Enjoy!
Subscribe to:
Comments (Atom)


